 Okay...we've made the part, but
how do you get placed in the rest of the nacelle?Okay...we've made the part, but
how do you get placed in the rest of the nacelle?
Okay...we've made the part, but
how do you get placed in the rest of the nacelle?Okay...we've made the part, but
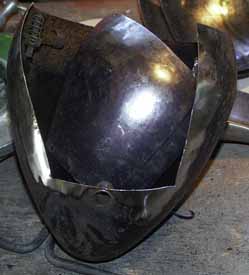
how do you get placed in the rest of the nacelle?It looks easy, but this is a very important part of the process.. As you saw, we clecoed the new part to the old part. Now we VERY CAREFULLY scribe the shape onto the old part. (Use a sharp tungsten from your TIG welder) I screwed up here...I should have left some tabs where the clecos were (see the hood part about #10)..but, we'll figure it out. The idea is to make these two pieces of metal razor sharp close to each other so that a fusion weld can be made between them. Review left and right cutting tin snips. A careful cut will save you lots of filing and frustration later, or, if you cut too wide you are going to have to fill the gap somehow.
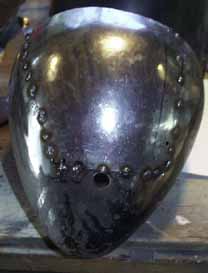 The next step is to tack..
the new piece into the old piece. HEY! Look at all that great solid old metal under the paint, rust and grime! The glass is 80% full...DON'T throw anything away. Those old headlights can shine again. I started tacking with a Mig welder right in the center down by the wire hole there. Then work out to either side of the corners, and on up. The first few tacks will be pretty tough, but, as you get closer to the end it all falls into place.
One problem with this is all the old metal involved...you have to grind and sand and file and make it as clean as you can or, when you weld later, you will be blowng holes every inch...TIG does not like rust and corruption.
 Now I grind away these little mig
bullets...
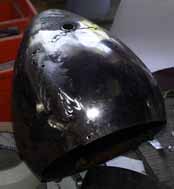
Now I grind away these little mig
bullets...Again..BE CAREFUL. I used a clean 36 grit disk keeping it very flat so as not to grind any of the sheetmetal, just the tacks. Don't forget the inside...when you start to hammer and dolly this into final form these deposits will just emerge and make bumps if you don't....
Well, it's gotten past my skill level now for now...I'm going to see if I can't get Paul to TIG weld in between the tacks, (moving around so as not to cause overheating or warping). I just don't want to risk my cobby welding now that I have got something that looks ball park and this 60 year old pitted metal can throw some curves!
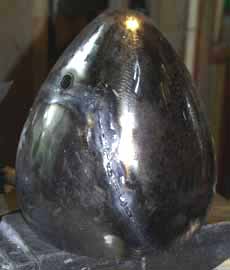 Boy! I'm glad I had Paul do this...I
was blowing holes through this pitted old thing every 5 seconds...anyway,
he just zipped it up, filling each hole that developed with a
TIG welder. I filled the cleco holes by backing up with an old
dolly and giving it a good MIG blast. Ground down it looks pretty
darned good! You'll have to grind down both sides so you can hammer
and dolly without creating bumps. We will also have to fabricte
the mounting hardware and install it. Later maybe. BTW while all
this was going on, I took one of my previous "out takes"
, cut off the back half and repeated this procedure in another
bad spot on the other side. It was a lot easier because it was
mor like just a rim area.
Boy! I'm glad I had Paul do this...I
was blowing holes through this pitted old thing every 5 seconds...anyway,
he just zipped it up, filling each hole that developed with a
TIG welder. I filled the cleco holes by backing up with an old
dolly and giving it a good MIG blast. Ground down it looks pretty
darned good! You'll have to grind down both sides so you can hammer
and dolly without creating bumps. We will also have to fabricte
the mounting hardware and install it. Later maybe. BTW while all
this was going on, I took one of my previous "out takes"
, cut off the back half and repeated this procedure in another
bad spot on the other side. It was a lot easier because it was
mor like just a rim area.
Well...this seems like a lot of trouble, and it does invlove some specialized skills and tools but I will tell you, this is the first actual metalshaping project I have ever done..i.e. I've moved metal around experimentally, but never moved it into a particular shape to fit in a particular place like this. It was a lot of fun and I now have some really first rate trading stock, or a good set for a future restoration project (God forfend). It also really gives me a lot of knowledge about evaluating headlight buckets if I find any. Even Paul my guardian angel here was impressed and said he would have thrown these old things out, and master Metalman Bruce Terry just laughed when he saw what I started with. SO DON'T THROW ANYTHING AWAY!
If you think you would be interested in developing metalshaping skills I highly recommend that you joint the Metalshapers egroup on Yahoo.